Appearance
WhatsApp

The WhatsApp Business Platform gives medium to large businesses the ability to connect with customers at scale. You can start conversations with customers in minutes, send customer care notifications or purchase updates, offer your customers a level of personalized service and provide support in the channel that your customers prefer to be reached on.
We are going to show here how to integrate OpenCUI with WhatsApp and deploy the chatbot to a OpenCUI hosted environment. For the private deployment, please consult systems in your organization.
Follow these steps to configure:
Before you begin
On the WhatsApp side, please ensure you have all of the following:
Set up WhatsApp
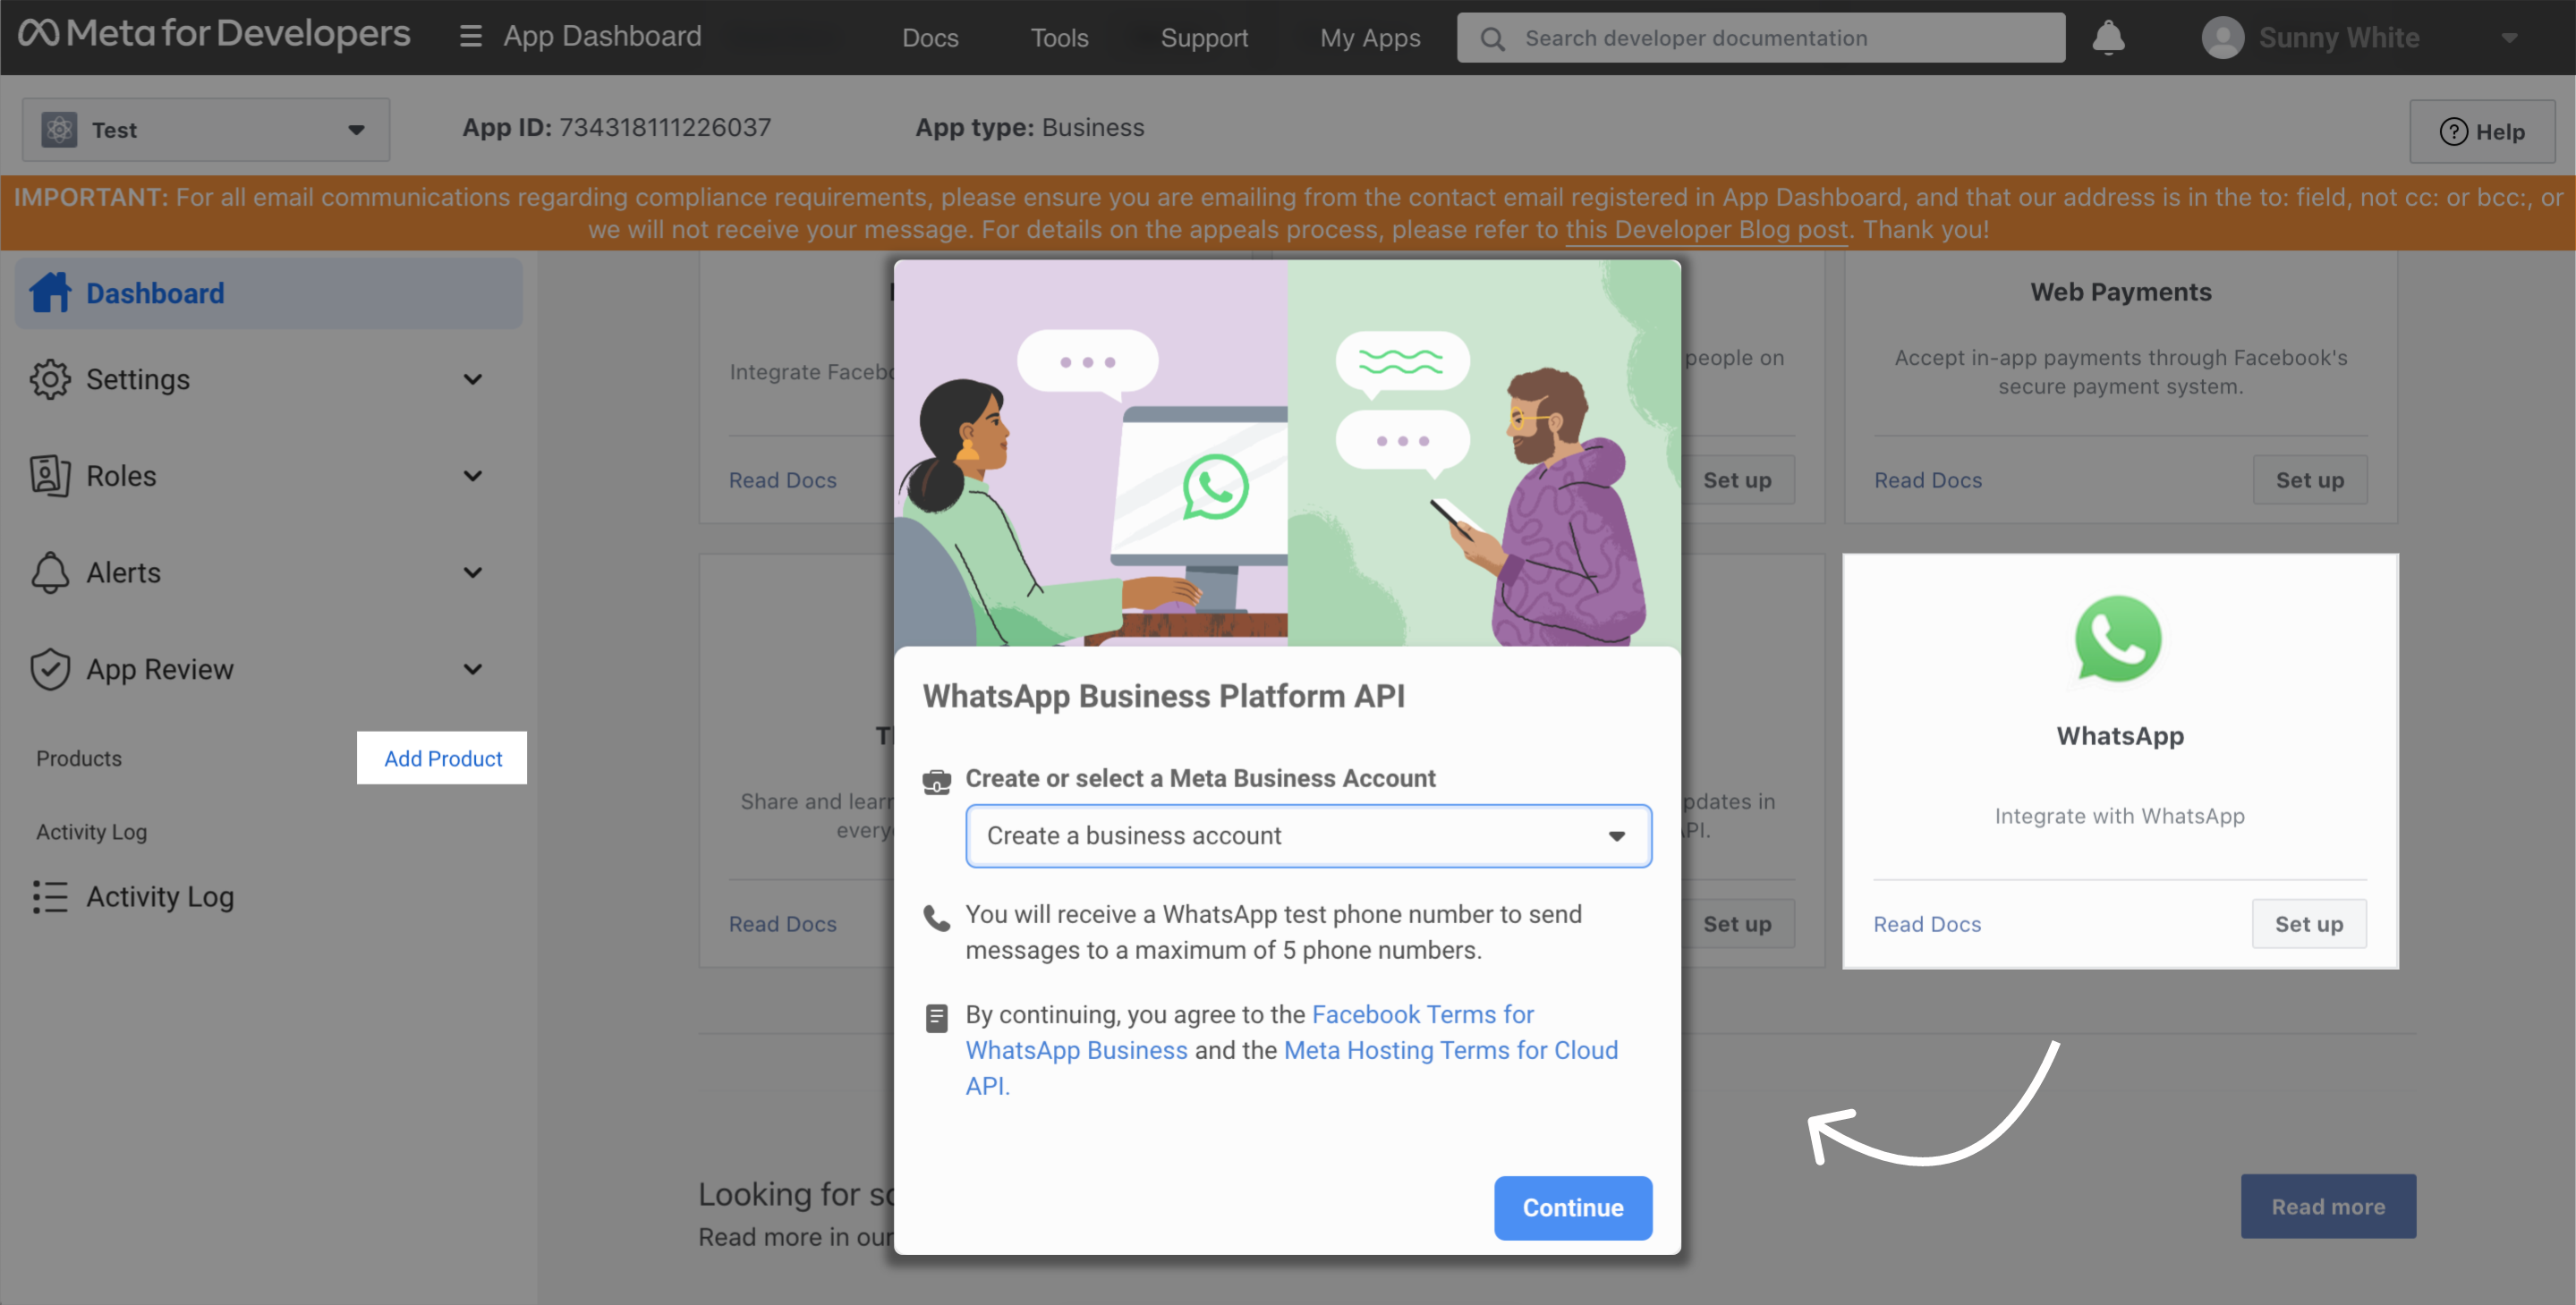
Add WhatsApp product
Use Meat App Dashboard to add the WhatsApp product to your Meta App:
- Enter the App you want to configure, click Add Product on the left sidebar menu.
- Click Set Up button on WhatsApp product.
- In the pop-up window, make a selection in Create or select a Meta Business Account field, and click Continue.
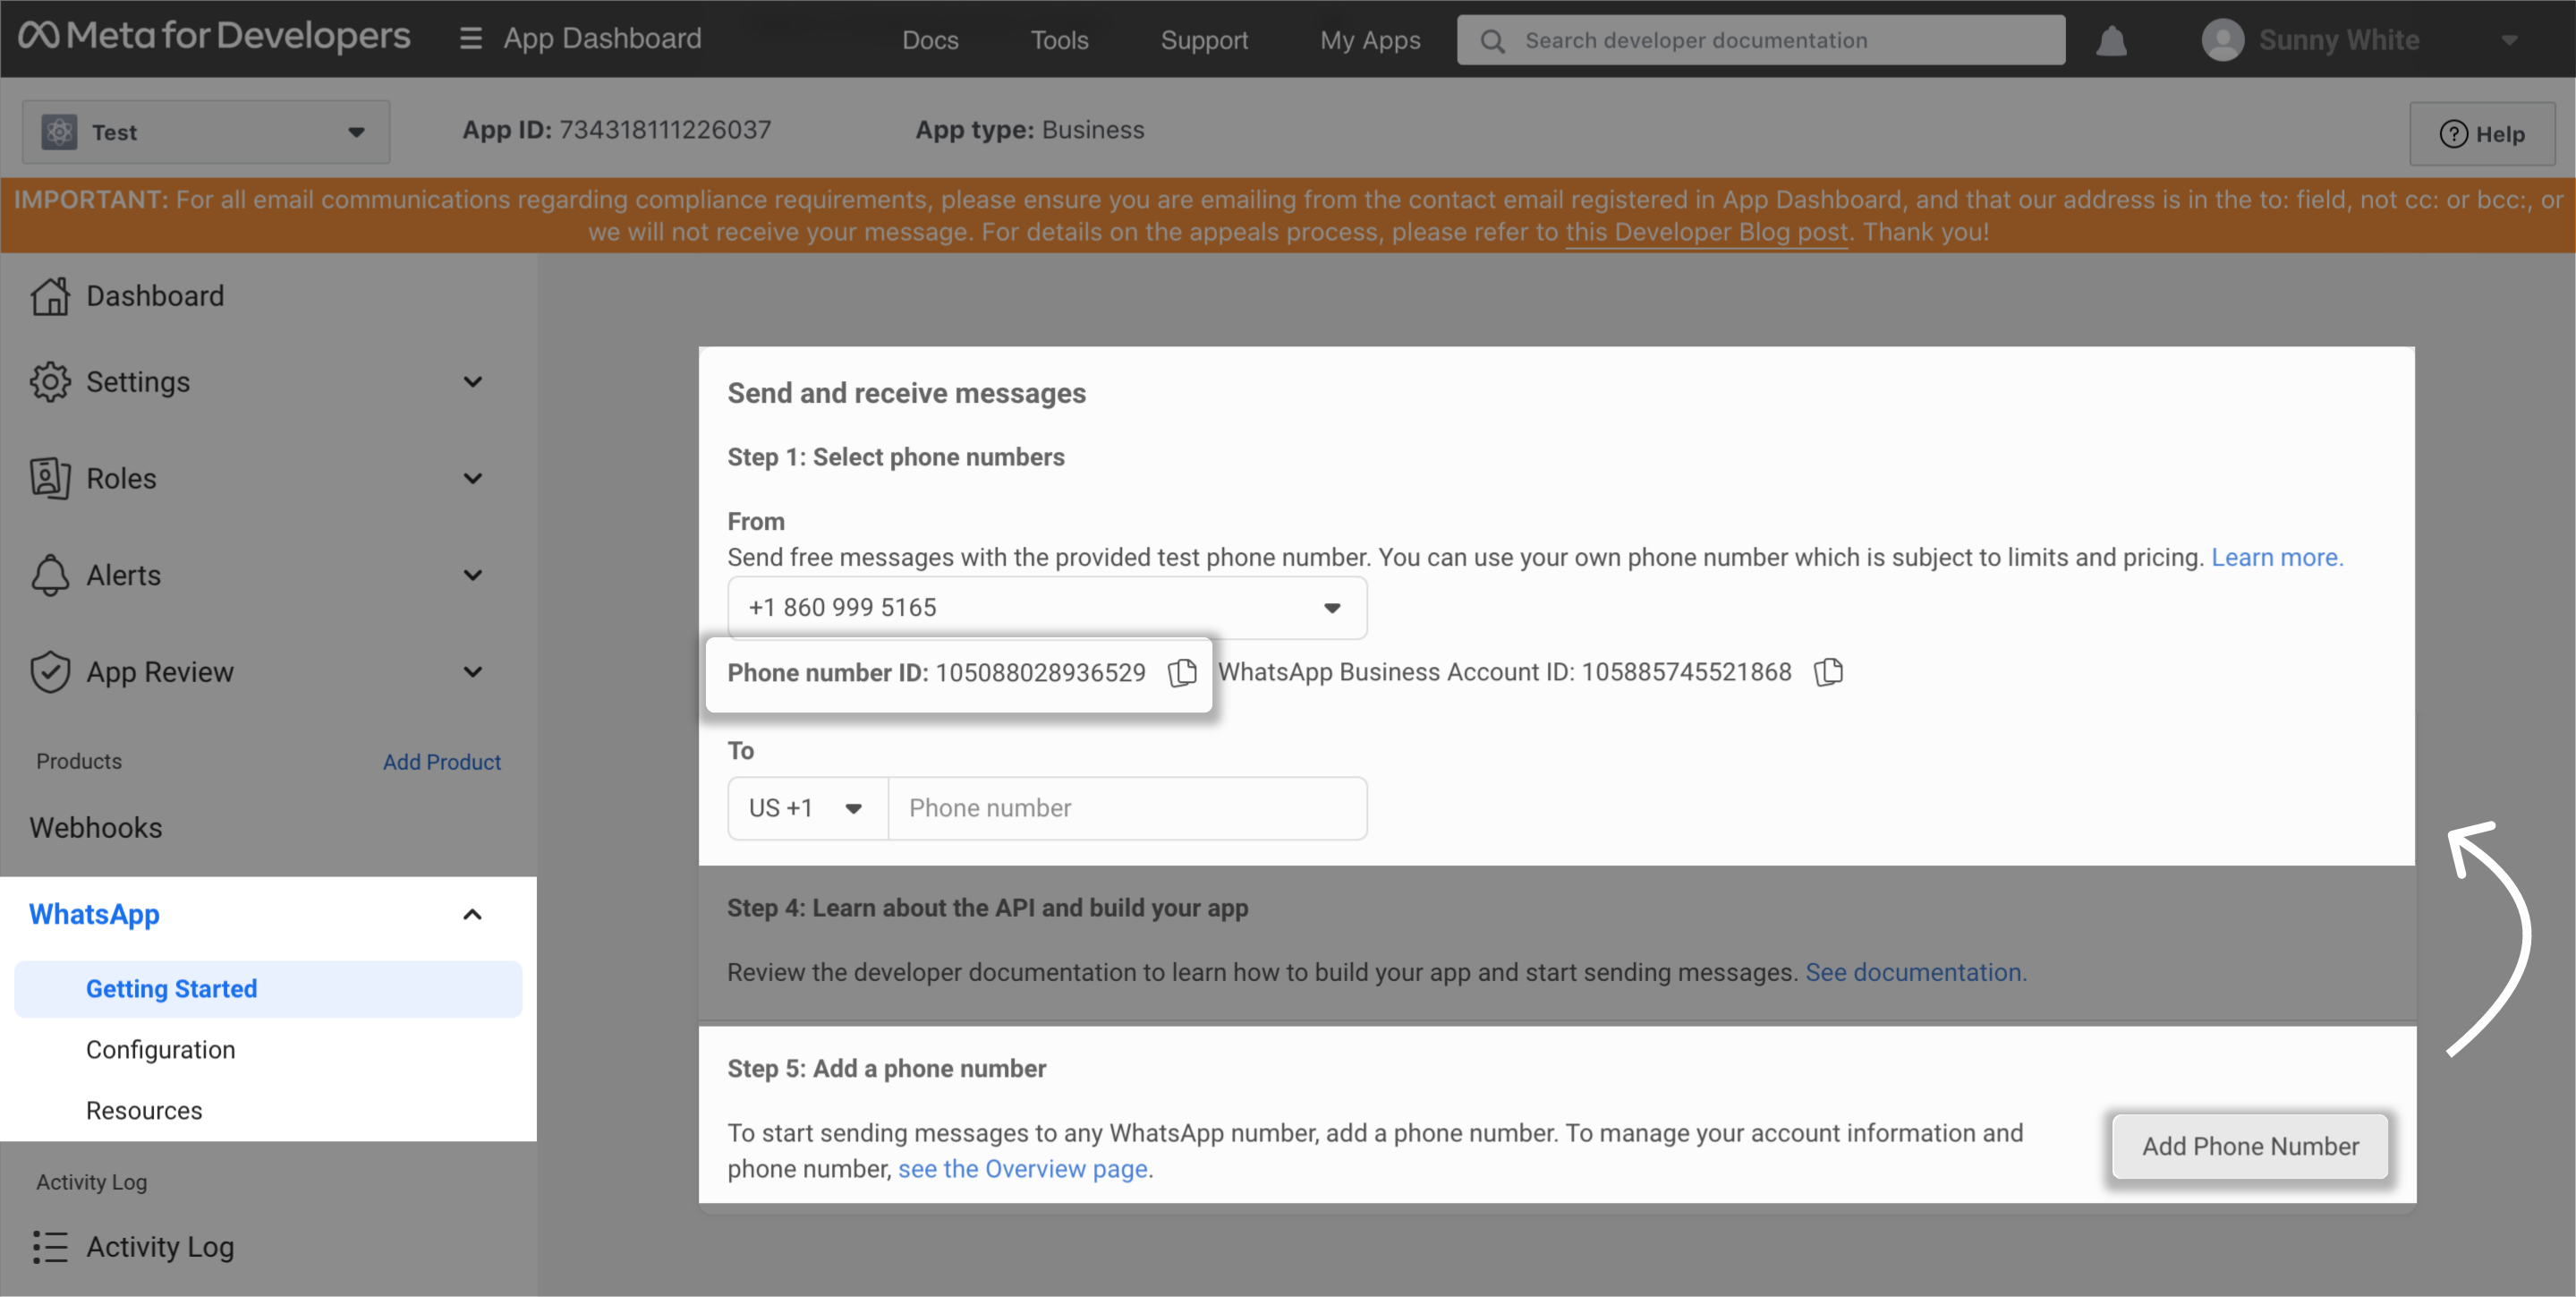
Set business phone number. Go to WhatsApp > Getting Started panel:
- Scroll down to Step 5, and click Add Phone Number. Follow the instructions to complete your business information and verify the phone number.
- Refresh the website, back to Step 1. Select the phone number you just added and 📋 copy the Phone number ID.
Get access token
In the Business Manager, go to your Business Settings page.
Go to Users > System Users panel, click Add button to add a system users.
Once you have added a system user, click Generate New Token.
In the Generate token pop-up window:
- Select the Meta app you created above.
- Select
whatsapp_business_messagingin Available Permissions checkbox. - Scroll down to the bottom of the popup window, click Generate Token button.
📋 Copy and save your token.
On the same page, click Add Assets. Select your Meta app, enable Manage app control and click Save Changes.
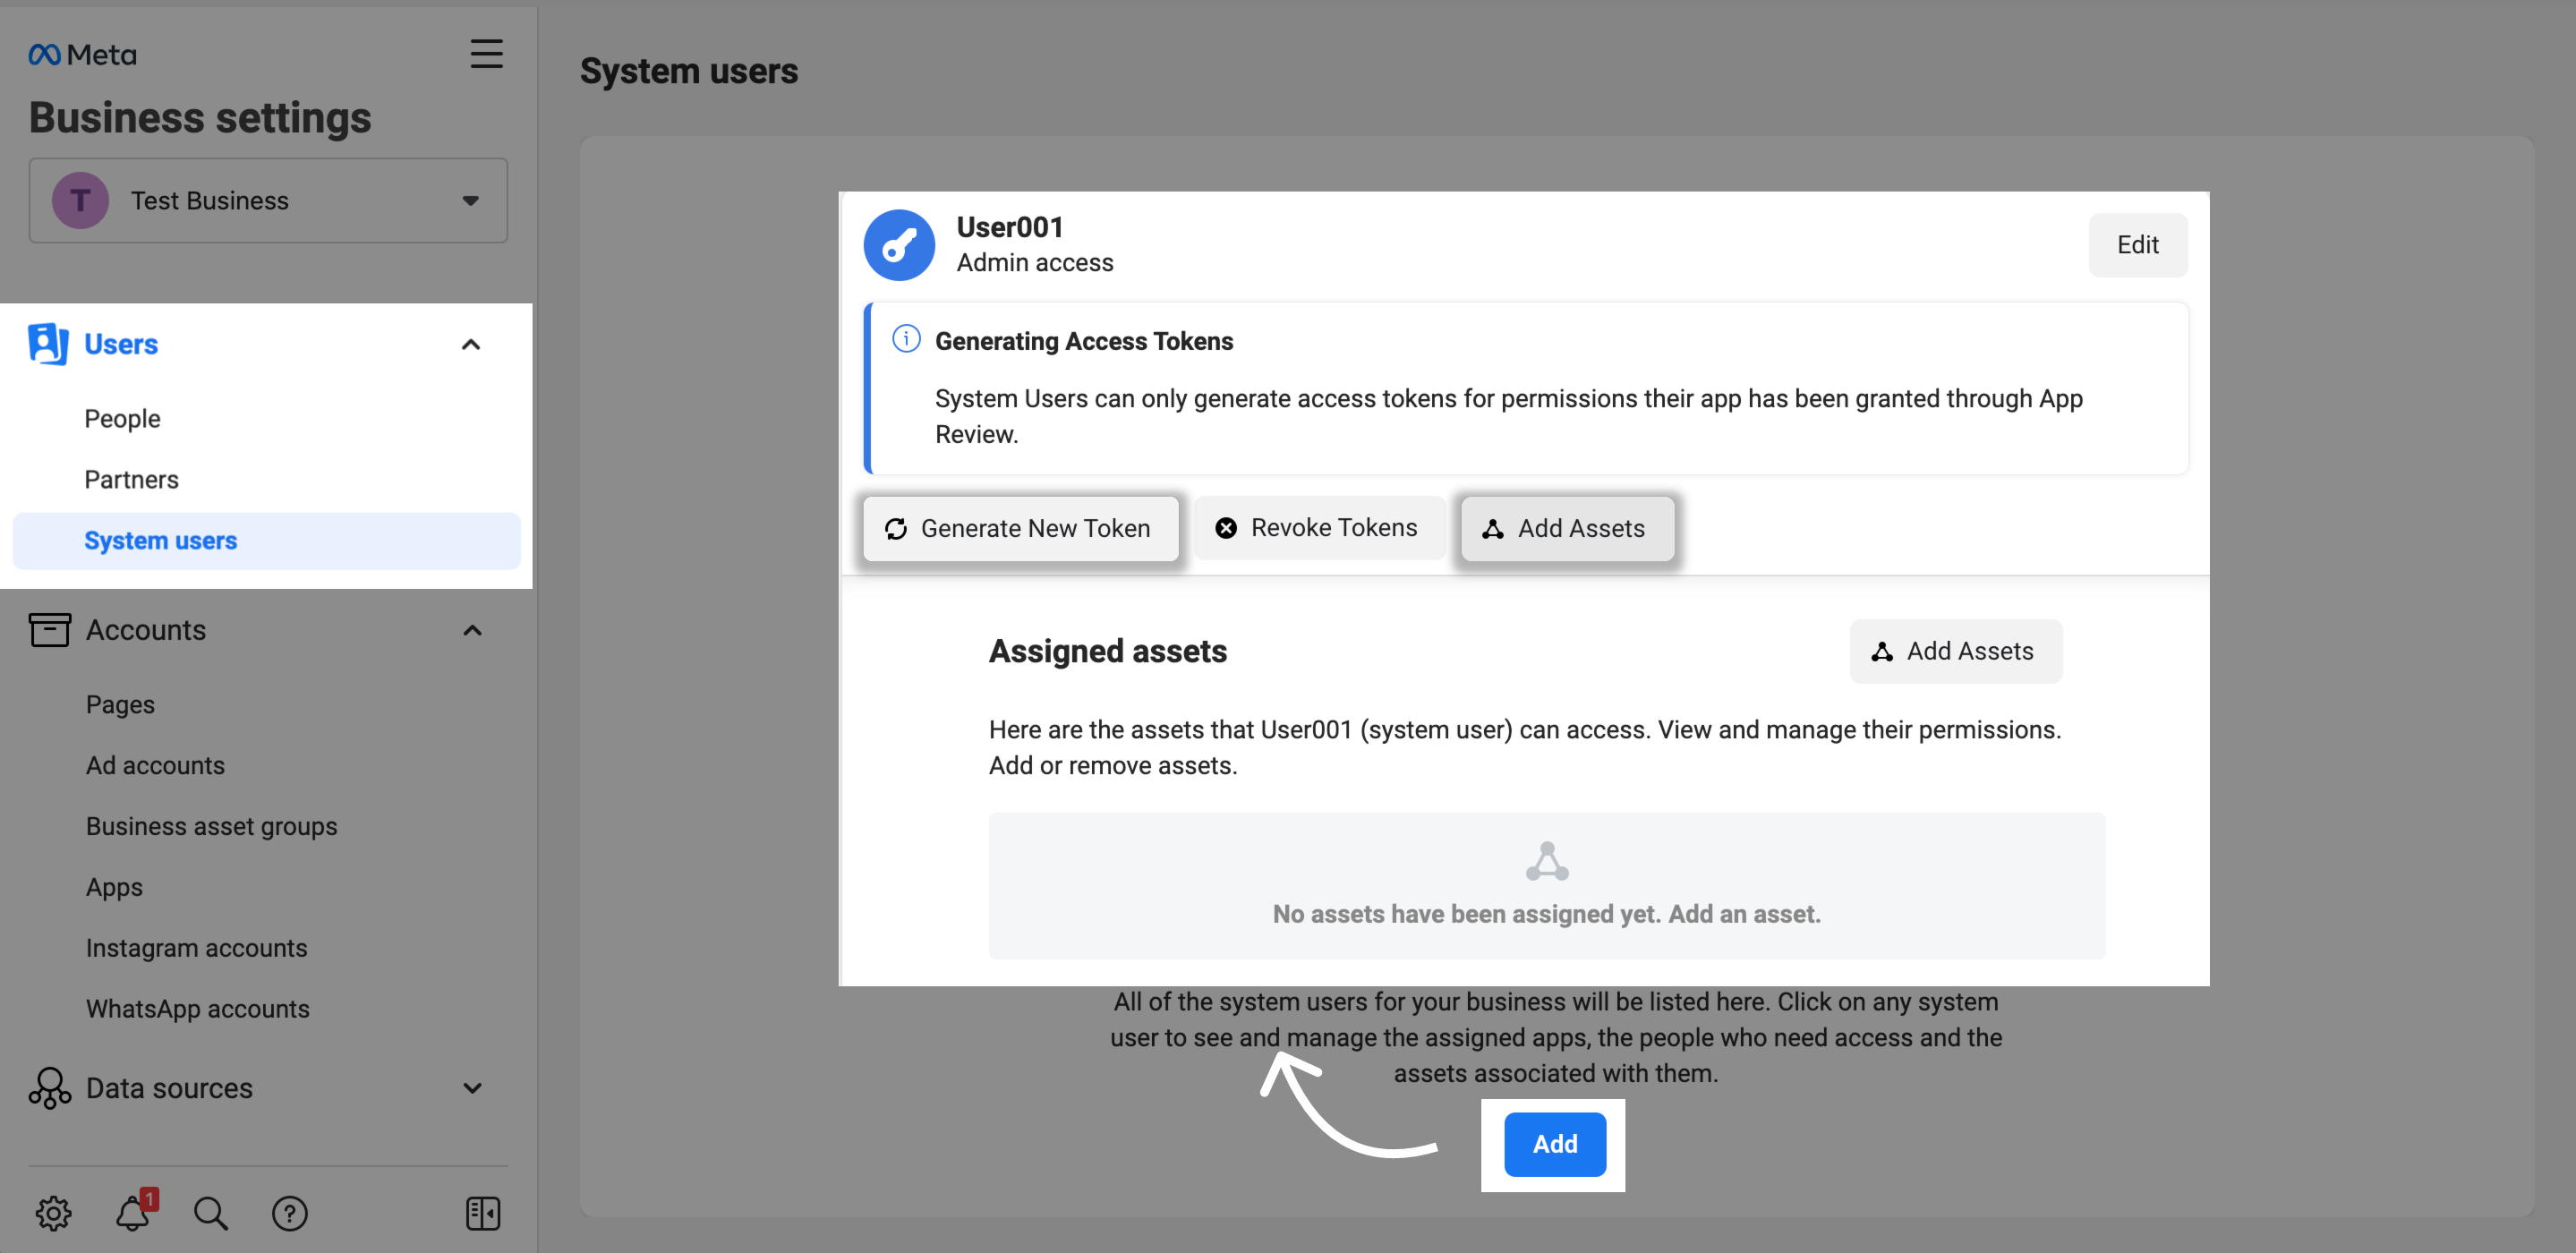
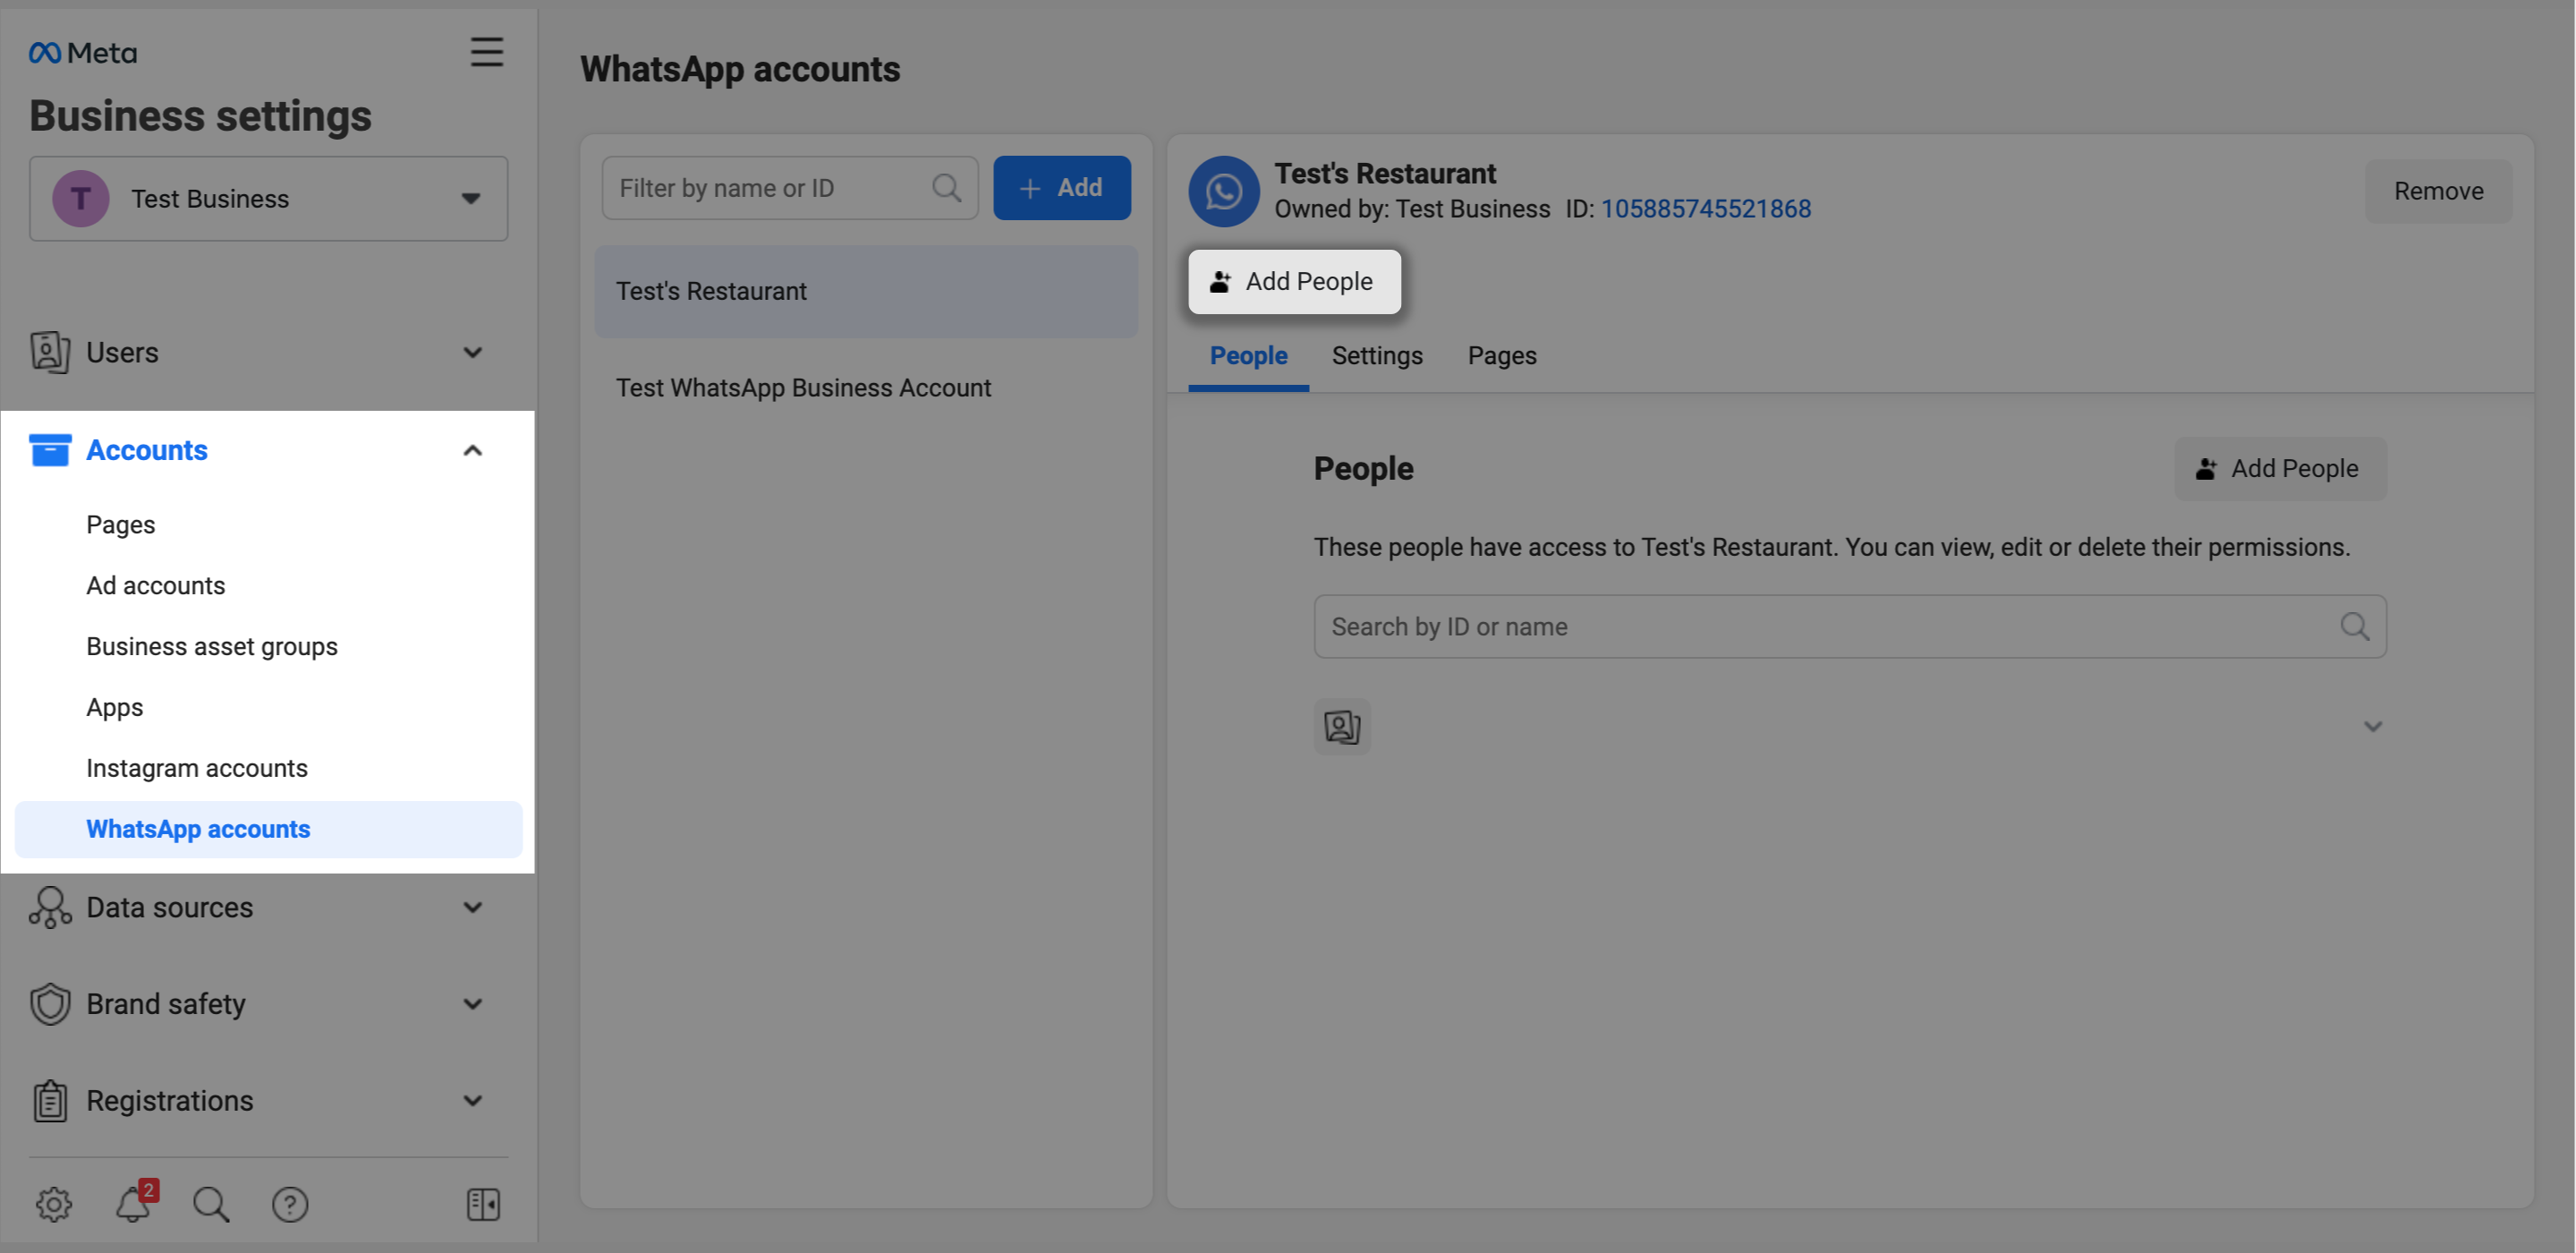
Go to Accounts > WhatsApp accounts panel, select your business account and click Add People. Then select the system user you added in step 1, enable Manage app control, and click Assign.
Configure WhatsApp from OpenCUI
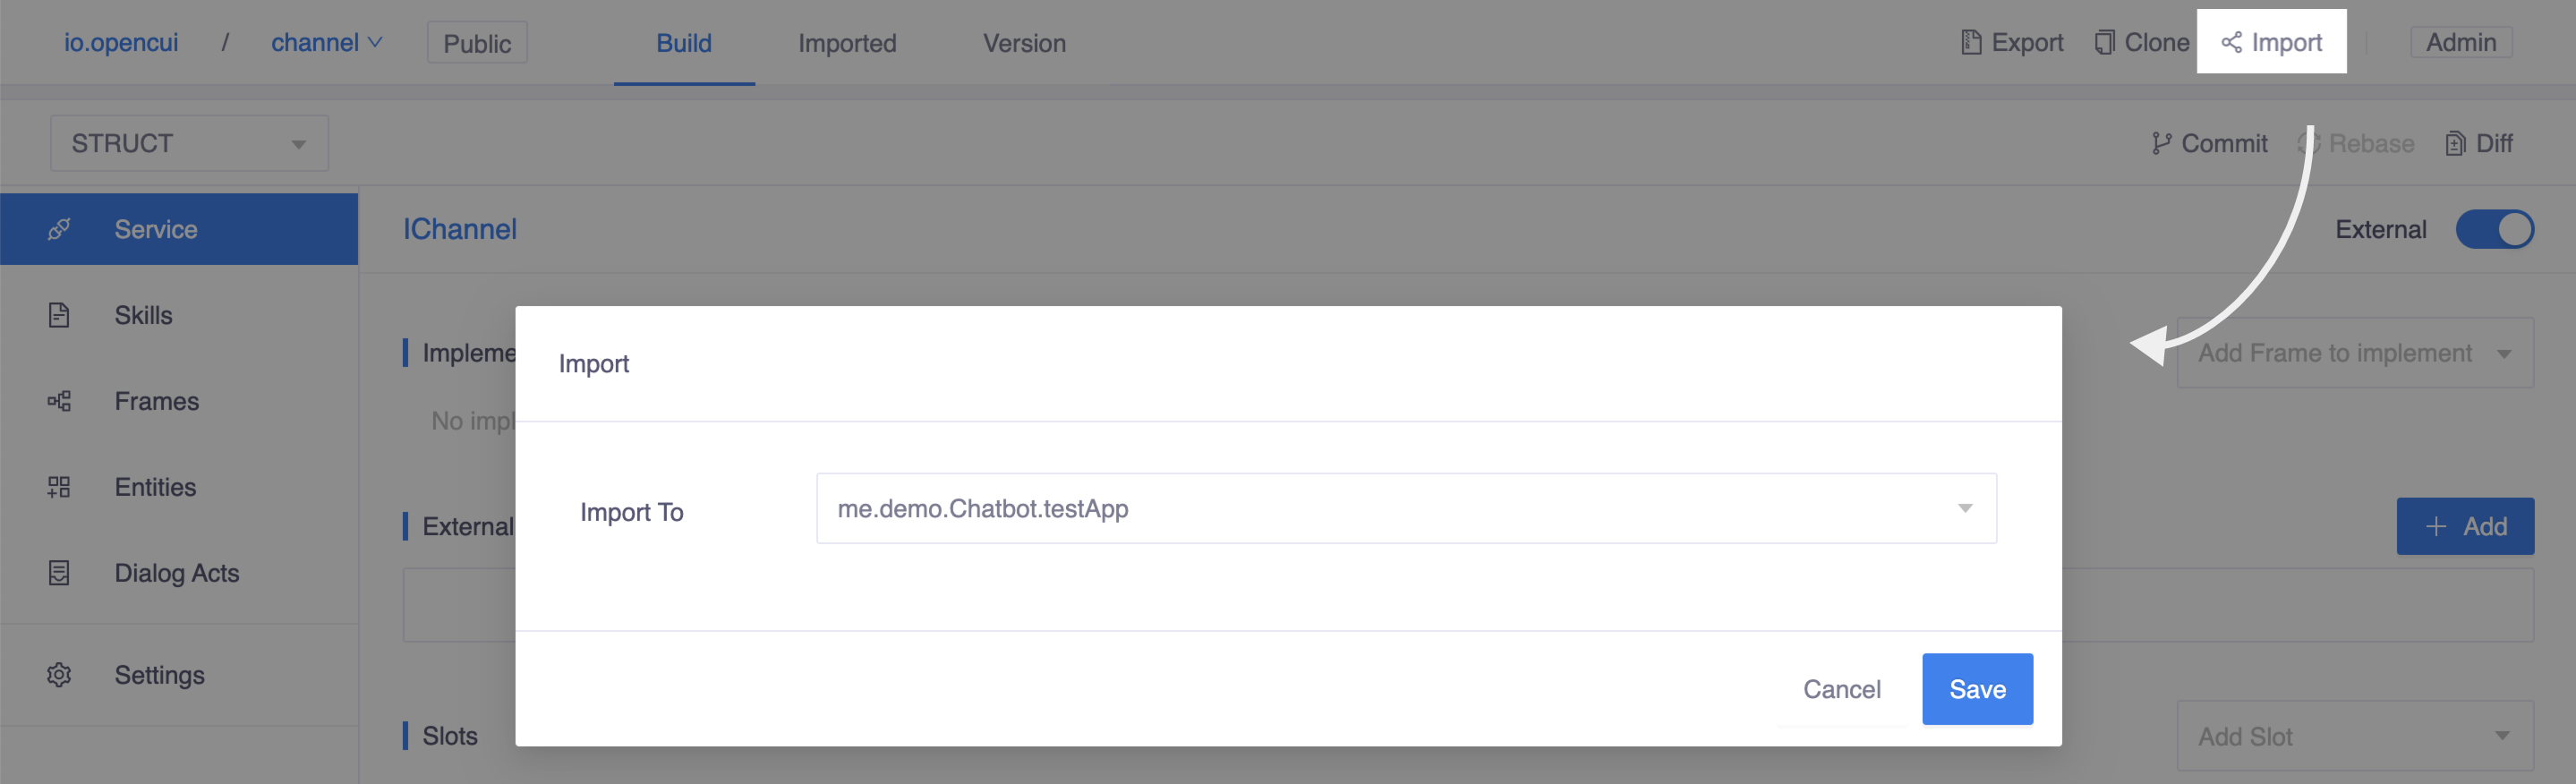
On OpenCUI platform, go to service component io.opencui.channel:
- Click Import button on the second topbar.
- Select the chatbot you want to configure WhatsApp channel and Save.
Once you have done, switch to your chatbot to wire WhatsApp channel:
- On STRUCT level, head to Settings page, in the Integrations tab, select the service you just import. In this case, please select io.opencui.channel.IChannel.
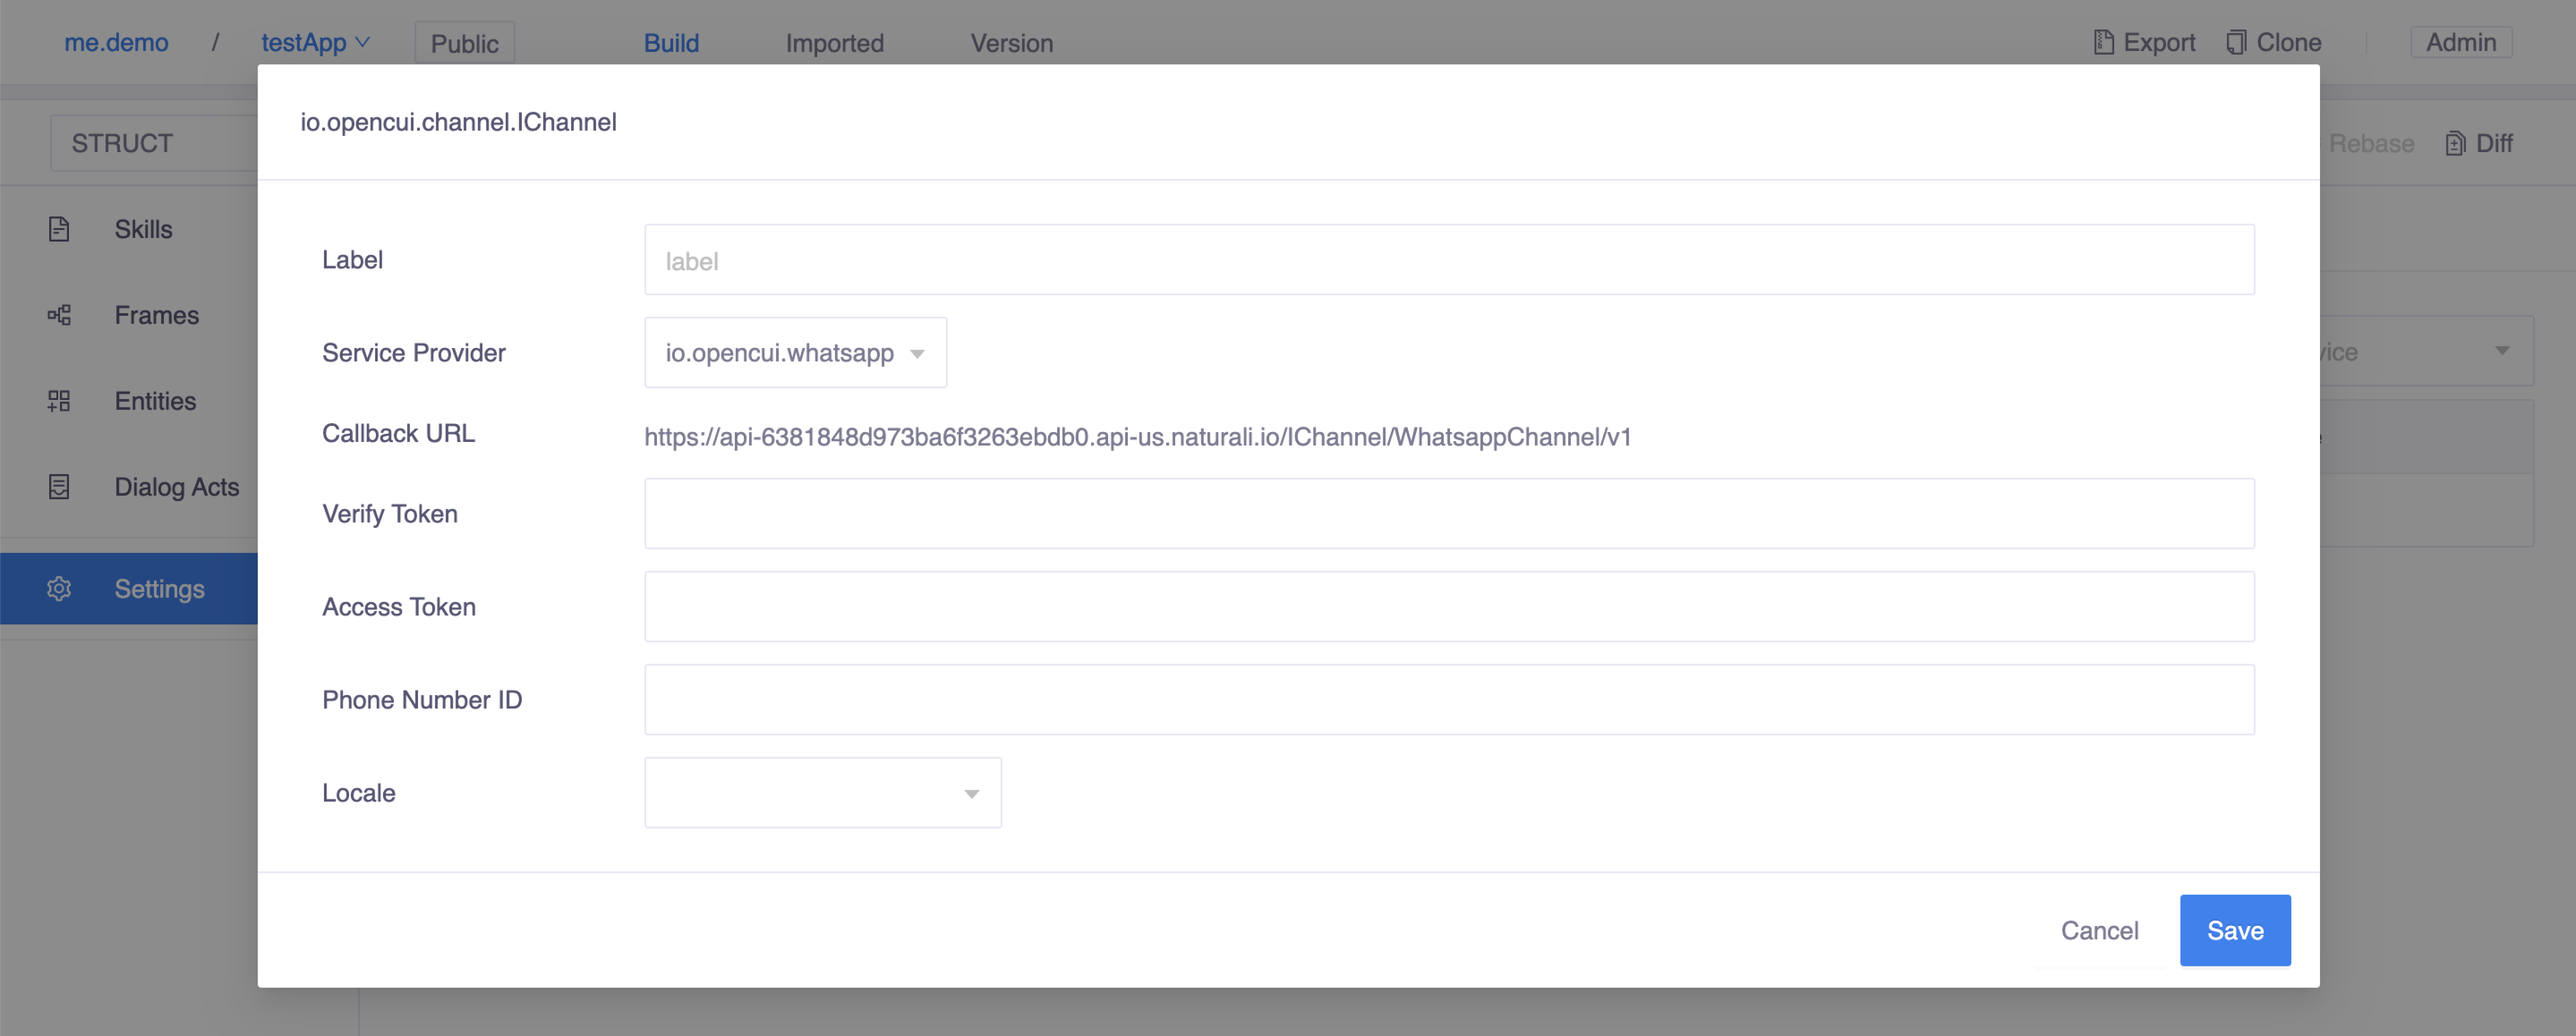
- A configuration dialog opens, at Service Provider field, select io.opencui.whatsapp to wiring WhatsApp channel.
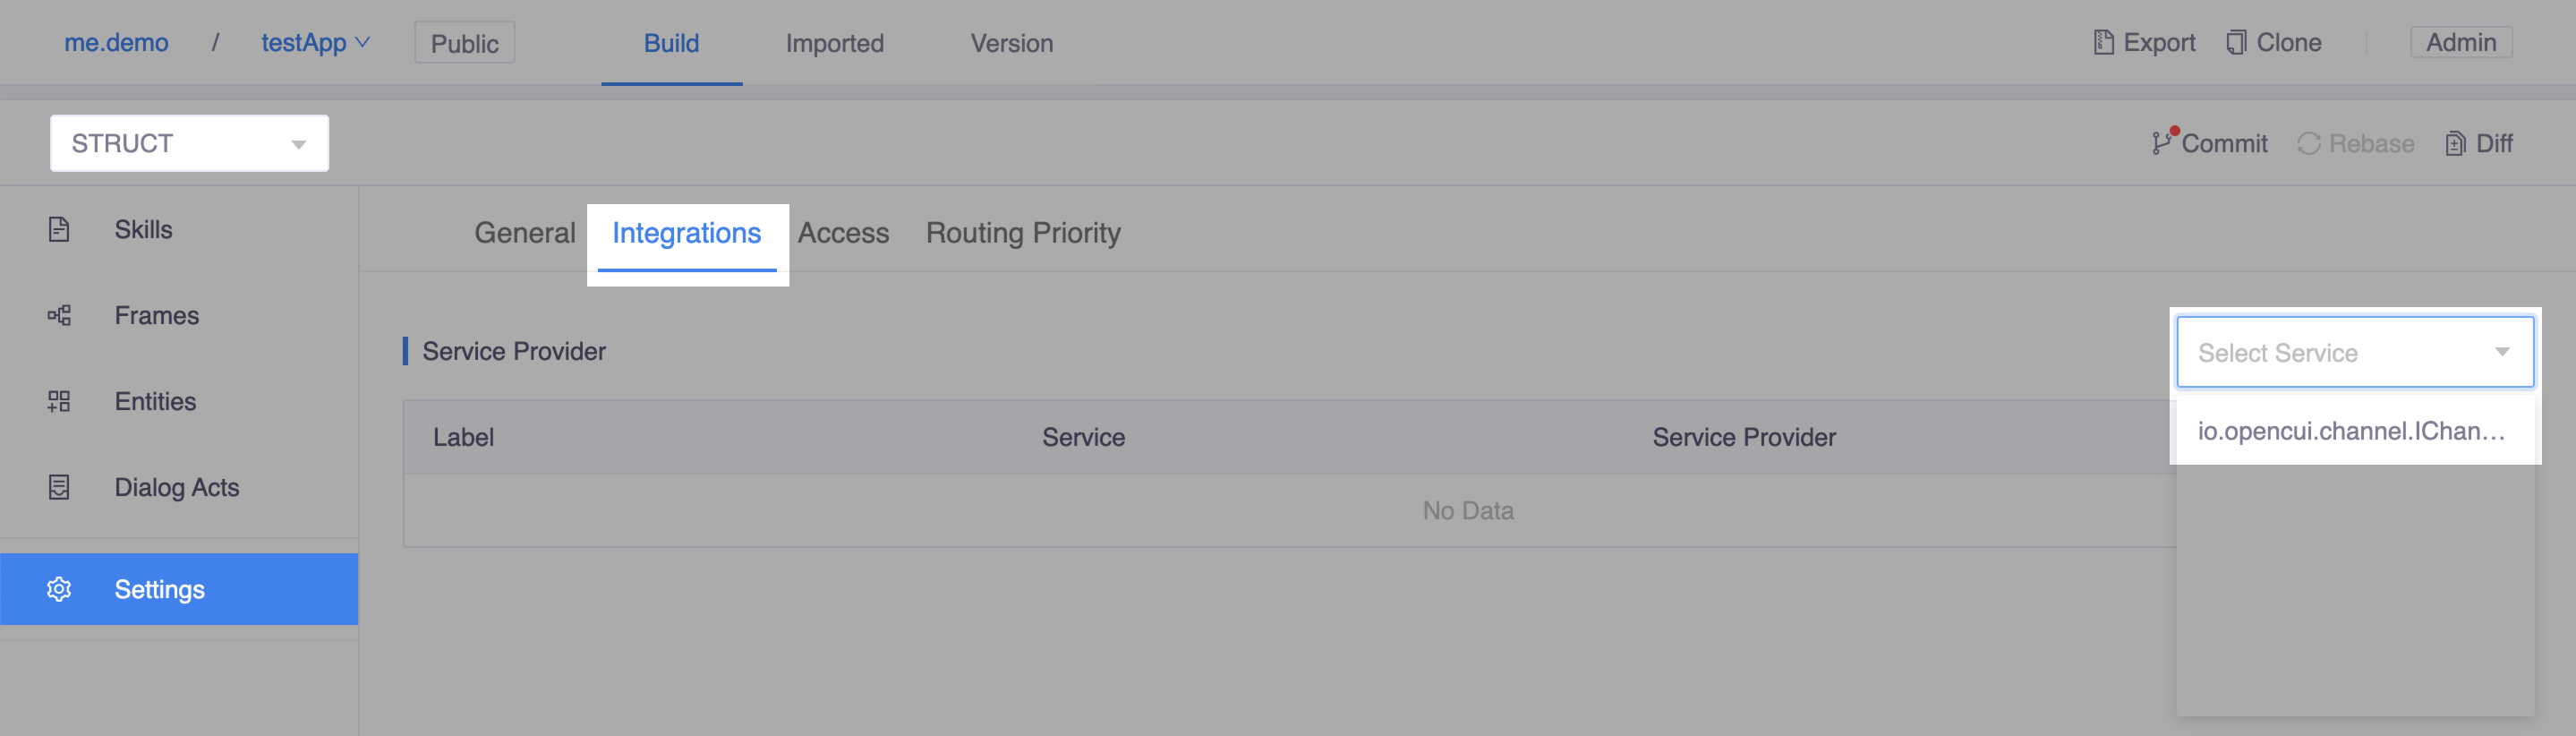 Select service io.opencui.channel.IChannel
 Wire WhatsApp channel
Continue inside the dialog, configure WhatsApp integration as following:
- Label: Enter channel label, should be unique.
- Verify Token: Enter any verify token you desire. 📋 Copy this value. This will be used to configure the WhatsApp Webhook.
- Access Token: Paste the token you copied during the WhatsApp setup above.
- Phone Number ID: Paste the Phone Number ID you copied during the WhatsApp setup above.
- Locale: Select locale which determines the default language used by your bot.
- Callback URL: 📋 Copy this value after setting the label and locale. This will be used to configure the WhatsApp Webhook.
Before you go to next step, don't forget to merge your changes into master and deploy your chatbot.
Finish WhatsApp setup
Configure the WhatsApp webhook for your app. Back to your Meta App:
- Go to WhatsApp > Configuration panel, in Webhooks section, click Edit button.
- A Webhook setting dialog opens, use the Callback URL and Verify Token values you copied above, click Verify and Save button.
In the Webhooks section, Click Manage button and subscribe
messages.
Test your chatbot
To test your chatbot, open WhatsApp and send a message to your business phone number. If you get a response, you have fully set up your app for receiving messages! 🎉